Screen recording software popularity has grown rapidly thanks to the vast increase in usage among business, educational, and social media content creators. The global screen capture software market is projected to grow by 13.4% in 2024, reaching $9.6 billion from $8.45 billion in 2025.
HP is one of the most popular laptop brands, serving individuals in business, education, and the home. There are several ways to record your screen on an HP laptop, from the built-in Microsoft Windows tools, such as PowerPoint and Xbox Game Bar, to the massive range of third-party screen recording apps available.
This article will show you how to screen record on a HP laptop, the different methods available, and provide some top tips for achieving a seamless, successful screen recording experience.
By the end of this article you’ll know how to:
- Use a free in-built screen recorder on your HP laptop
- Use the leading third-party screen recorder
- Understand how to troubleshoot common issues
Let’s get into it.
How to screen record with Windows 10/11 Built-in Screen Recorder (Xbox Game Bar)
All HP laptops with Windows 10 or 11 have a free built-in screen recording system called Xbox Game Bar.
Here’s a step-by-step walk-through of recording your laptop screen using the tool.
1. Select the app you want to record
Click on the window, tab, or app you want to record and bring it to the front of your screen.
2. Press “Windows Key + Alt + R” to record
Pressing “Windows Key + Alt + R” automatically records your screen. An Xbox Game Bar widget on your screen informs you how long you’ve been recording.
3. Record video and audio
The screen recorder automatically captures whatever’s on your screen, including your device audio. It also records external audio, such as narration, via your laptop microphone.
Mute your mic if you don’t want to include a voiceover.
4. Press “Windows Key + Alt + R” to stop recording
Pressing “Windows Key + Alt + R” a second time will stop the recording. Alternatively, hit the “Stop” button on the on-screen widget.
5. Preview your recording
Hit on the “Game Clip Recorded” button to enter the in-app gallery. Here, you can view your screen capture before sharing.
6. Find the video file
Your MP4 file is saved in your Videos/Captures folder in Windows Explorer.
Xbox Game Bar pros
- 100 free
- Easy to use
- Can be used for gaming, professional presentations, or educational content
- Records mic audio and system audio
Xbox Game Bar cons
- No editing suite
- Saves video to your hard drive, taking up storage space
- Doesn’t work with older-spec HP laptops
- Only records one window at a time
How to Screen Record on a HP Laptop with Microsoft PowerPoint (Step by Step)
The second method for recording your screen with a Windows built-in app is PowerPoint’s screen recording capability. PowerPoint directly embeds recordings into your presentation deck. Here’s how to do it.
Step 1. Select your slide
Select the presentation slide into which you want to insert the screen recording.
Step 2. Select “Screen Recording”
Click on the “Insert” tab on the top toolbar. Go into “Media” and then click “Screen Recording.”
Step 3. Select the screen area
The Control Dock pop-up will appear. Click “Screen Area” and drag the cross-haired cursor from top-left to bottom-right to capture the screen area you want to record.
Step 4. Record
Click “Record” in the Control Dock to begin recording. Whatever’s inside the red dashed rectangular area will be captured.
Step 5. Stop recording
Either press the “Stop” button in the Control Deck or “Windows key + Shift + Q” to stop the capture. The recording will automatically be embedded into your presentation slide.
PowerPoint pros
- Directly embeds screen recordings into presentation slides
- Captures audio voiceover
PowerPoint cons
- No video editing suite
- Cannot share videoed content with others
- No webcam capture
Dedicated tools for Screen Recording on a HP Laptop
Here are three of the best third-party apps for screen recording on your HP laptop.
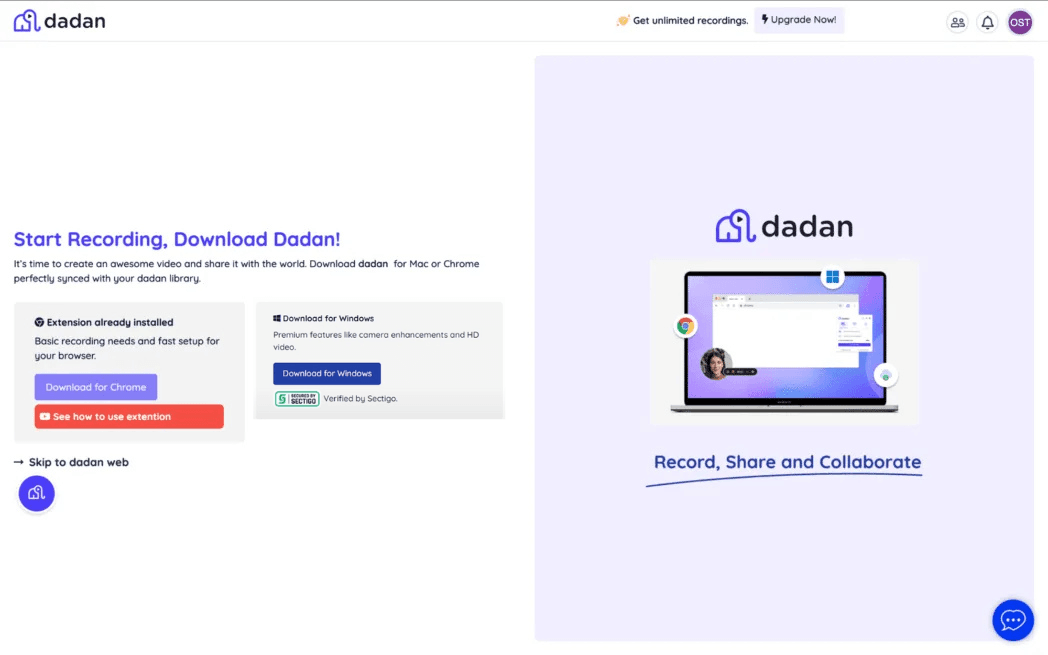
1. Dadan

Dadan offers a comprehensive screen recording package for HP laptops. The free version offers a generous number of tools, while the paid subscription is excellent value for money.
Here’s how to record your screen with Dadan on your HP laptop:
1. Sign up for Dadan
Sign up for your free Dadan account using your Google or Microsoft account details.
2. Download Dadan

Click the “Download for Windows” link at the top of the screen. Once downloaded, click the “Setup” file to launch the install wizard.
3. Open the app
Once it’s installed, launch the desktop app
4. Configure your video and audio
Configure your video and audio settings. Choose whether you want to capture your screen, webcam, or both. Then, select whether you want to capture your entire screen, a specific window, or a custom area.
Then, configure your audio settings to select your microphone for any voiceover.
5. Begin recording
Click on the “Start Recording” button to begin your screen recording. Once done, click the “Stop” button in the pop-up toolbar.
2. Camtasia

Camtasia is a popular screen recorder for HP laptops that comes with an outstanding editing suite.
1. Download Camtasia
Create a Camtasia account and download the software. Install Camtasia using the “Setup” file in your downloads folder
2. Configure your video and audio
Open the app and configure your video and audio settings.
Select whether you want to record your screen, webcam, or both. Then, select whether you want to capture your microphone, system audio, or both.
3. Select your recording area
Drag the handles on the highlighted area to increase or decrease the recording area.
4. Record
Click the “Record” button to begin the recording. Once done, click “Stop.”
3. OBS Studio

OBS Studio is an open-source and 100% free screen recording software with an excellent live-streaming option. This has made it a popular choice among gaming live streamers.
1. Download OBS Studio
Download OBS Studio from their website and install it on your desktop.
2. Configure your settings
Select Studio Mode. This separates your screen into a preview pane and a live pane.
Click on “Sources”, “Windows Capture,” and “Create New.” Select the window you want to record from the list.
3. Record
Click “Start Recording” once you’ve selected the area of the screen you want to record.
4. Stop recording
Click “Stop Recording” once your recording is finished. The video is automatically saved in your “Videos” folder.
Pros and cons of dedicated screen recording tool
| Software | Pros | Cons |
| Dadan | Easy to use 4K video quality Sync video and audio Cursor highlights AI-powered features Custom-area recording Excellent editing tools URL link sharing Excellent value for money | Doesn’t work with older versions of Windows |
| Camtasia | Easy to use High-quality recordings Video and audio capture Outstanding editing tools Custom-area recording | Expensive Editing tools can be complex to learn |
| OBS Studio | Open source 100% free Excellent live-streaming capability Ideal for gamers Custom area recording | No editing tools Can be difficult to learn Lacks versatility |
Getting the most from your screen recording software
Now you know how to record your screen on your HP laptop, here are some top tips on elevating your content to the next level.
Customize your screen recording
If you’re unhappy with your video quality, you can make some adjustments to help get the quality you need. Increase the frame rate to improve the image smoothness. While 30fps should be sufficient for most content, you may want to increase this for some requirements. Just beware that higher frame rates increase the file size.
Also, check your resolution and make changes if necessary. If you’re recording for YouTube, 1920×1080 is standard. If you’re presenting on a big screen, you may want to use 4K resolution. If you’re creating for TikTok and Instagram, predominantly used on the small screen, 720p is sufficient.
Finally, customizing the section of the screen you want to record improves the quality of your recording. Click and drag to select the part of the screen you want to record; choose a specific window or application or full-screen recording.
How to record audio along with video
Recording your audio and video is relatively easy on your HP laptop.
Open your screen recording software and click on the audio settings icon. Then select your audio source from your system audio, internal microphone, and external USB or wireless mic if you have them.
Test your audio levels before recording to ensure no echo or background noise. Speak clearly, and don’t be too close to the mic.
How to edit your screen recording
Most video recording software includes some editing capability. Free software has basic functionality, such as trimming and exporting, while more advanced features require a paid subscription.
Check out our How to Edit Screen Recordings guide for more detailed tips on editing screen recordings.
Common issues and how to fix them
If you encounter problems with screen recording with your HP laptop, here are some common issues other users have discovered and how to resolve them.
Screen recording not working on HP laptop
There are several reasons why your screen recorder may not be working on your HP laptop.
Make sure your laptop meets the minimum requirements for your chosen screen recording software. For example, check that your software is compatible with your operating system – some tools don’t work with earlier versions of Microsoft Windows – and that all drivers are current. Ensure your CPU can handle your screen recording tasks, and if not, consider upgrading your system.
Check your software permissions to ensure your software can access your webcam and microphone. Go to “Settings,” then “Privacy,” then “Camera,” or “Microphone,” and enable permissions if needed.
Finally, check whether you have other applications open that require you to use your webcam or microphone. Having them open may interfere with your recording process.
No audio in your video recording
If your recordings capture perfect video but lack audio, several things could be at fault.
Check your recording software’s audio settings to ensure the correct audio inputs have been selected. Open the “Settings” in your app and make sure the “System Audio” or “Internal Sound” is enabled.
If your software settings are correct, ensure your audio drivers are up-to-date. Go to “Device Manager” on your HP laptop, select your audio device, right-click, and select “Update Driver” to run any updates. This will apply patches and updates to ensure your system has the current version.
Also, check your Windows sound settings are set to record your system’s audio. Right-click the speaker icon in the taskbar at the bottom of your screen, select “Open Sound Settings,” and ensure the correct input and output devices are enabled.
Performance optimization tips
You may find that some recordings lag. Makes these changes to help improve the recording performance for crisp, sharp content.
Before recording, close any unnecessary background applications that can take up valuable memory and CPU space. Then, if necessary, lower the recording quality. Higher-quality recordings need more processing power, so reduce your recording software’s frame rate or resolution.
Ensure you’ve run all of your OS updates so that all your HP laptop drivers are fully up-to-date. Out-of-date OS drivers can impact your recording quality.
Some recording tools offer hardware acceleration to move some of the processing effort from your CPU to your GPU. Finally, make sure your HP laptop’s power settings are set to “High Performance” mode to maximize performance.
Get Started
If you have an HP laptop, you have a wide range of excellent screen recording tools to choose from. Your laptop has built-in tools, such as Xbox Game Bar and Microsoft PowerPoint, which are free to use but have limitations. Free software downloads like OBS Studio are ideal for live streamers, while paid options like Camtasia and Dadan provide a comprehensive screen recording and post-production environment to give your content a polish.
Consider what you need before committing to a particular piece of software, and find the one that meets your needs. For example, Dadan might be ideal if you’re looking for a tool that’s easy to use, offers outstanding video editing, and allows for easy content sharing for collaborative communication.
Why not kick-start your video creation journey today by taking advantage of Dadan’s free trial to explore their comprehensive screen recording software and outstanding editing suite to help you create enhanced content for work, school, or social use?
FAQs
Can I record on an HP laptop without downloading any software?
Yes, if your HP laptop has Windows 10 or 11, you can use the built-in Xbox Game Bar as a screen recording tool. If you’re creating a presentation that needs video content, you can record directly into Microsoft PowerPoint.
How do I record in HD or 4K resolution?
Before recording, configure your software tool’s video capture resolution to HD (1080p) or 4K for high-quality recordings.
What’s the best format for sharing my screen recording?
The best format for sharing your screen recording depends on your audience. Most screen recording tools save your content as MP4 files, which can be shared via email, cloud-sharing programs, or uploaded to YouTube and social media platforms. Some tools, such as Dadan, provide URL links for direct sharing.


