Editing screen recordings is a surefire way to elevate your video content to the next level. However, if you find the idea of editing your videos intimidating, particularly if you’re a newcomer, you’re not alone.
Thankfully, help is at hand as we guide you through everything you need to know about editing your raw video content and making it sizzle with professional flourishes. From trimming your content to adding annotations, adding a voiceover or soundtrack, we have all the tips of the trade to help you take your business, educational, and personal content into a new realm.
This comprehensive guide offers easy-to-follow steps and tips for editing screen recordings using various tools. From free editors with basic functionality to get you started, like Snipping Tool on Microsoft Windows, to paid editing tools like Dadan, which offer comprehensive and in-depth editing options designed to elevate your recordings to the next level, this step-by-step guide has everything you need to get started on your journey to editing excellence.
Tools you’ll need to edit screen recordings
Finding the right editing tool is essential to creating outstanding, engaging content that meets your requirements. Whether recording product presentations or webinars, giving feedback on educational assignments, or creating content to share on social media, editing your content to get it right makes the difference between something decent and content that fizzes.
So, what exactly do you need to remove awkward silences and pauses, create smooth transitions, remove background video, add stock photos and customize to fit your brand?
Free screen recording editor tools
Most devices on macOS and Windows have built-in free screen recording editing software. For instance, macOS systems come with iMovie and QuickTime, while Windows uses Snipping Tool as standard.
However, other editing tools that are 100% free and open-source are available for download, such as OBS Studio, which is widely used by gaming streamers and social media content creators. Meanwhile, most paid screen editing tools also come with a free version that offers a light-touch range of editing tools.
So, what features do these free software tools offer as standard for beginners and light editing functionality?
- Screen resizing
- Trimming
- Audio editing
- Captioning
- Cursor highlighting
Paid screen recording editor tools
While free editing tools are the perfect breeding ground for beginners to cut their video editing skills, more advanced editors will likely want more advanced features to elevate their creations to new levels.
Intermediate and expert users widely use tools like Camtasia, ScreenFlow, and Adobe Premiere Pro to maximize the more advanced editing features, which include:
- Transitions
- Multi-track editing
- Picture overlays
- Annotations
- Green screen effects
- Text-based video editor
Browser-based video editing tools
There is also a third option: tools that can be used straight through your web browser. Dadan is an example of a web-based video editor, meaning you don’t need to download software separately. Just sign up or log in and you’re ready to edit!
Some web-based apps, such as Web Paint Online, are open-source and completely free to use, albeit without an extensive range of editing features. Most web-based apps, including Dadan, require a paid subscription to use all their features but usually include a limited range for free.
Browser-based tools can provide beginners with many benefits, including:
- No lengthy software downloads
- Automatic software updates
- Easy communication with other users
- Easy integration with existing tools
How to edit screen recordings in 5 easy steps
Now that you understand the features of free, paid, and web browser tools, it’s time to walk through how to make those key edits to your screen recordings.
Here are five simple steps for editing your screen recordings, whether this is your first time or you’re an intermediate video recording editor.
For this walkthrough, we’ll use how to edit screen recordings in Dadan. Let’s get started.
Step 1: Import your recordings

Begin by uploading your video from your computer.
If the recording you want to edit is already hosted in Dadan, it will be in your library.
Once the video has been uploaded, click the video. From the video management page, scroll down and click ‘edit’ from the right-hand menu.

If you haven’t recorded your video, now is the time you can use Dadan’s built-in screen recording functionality.
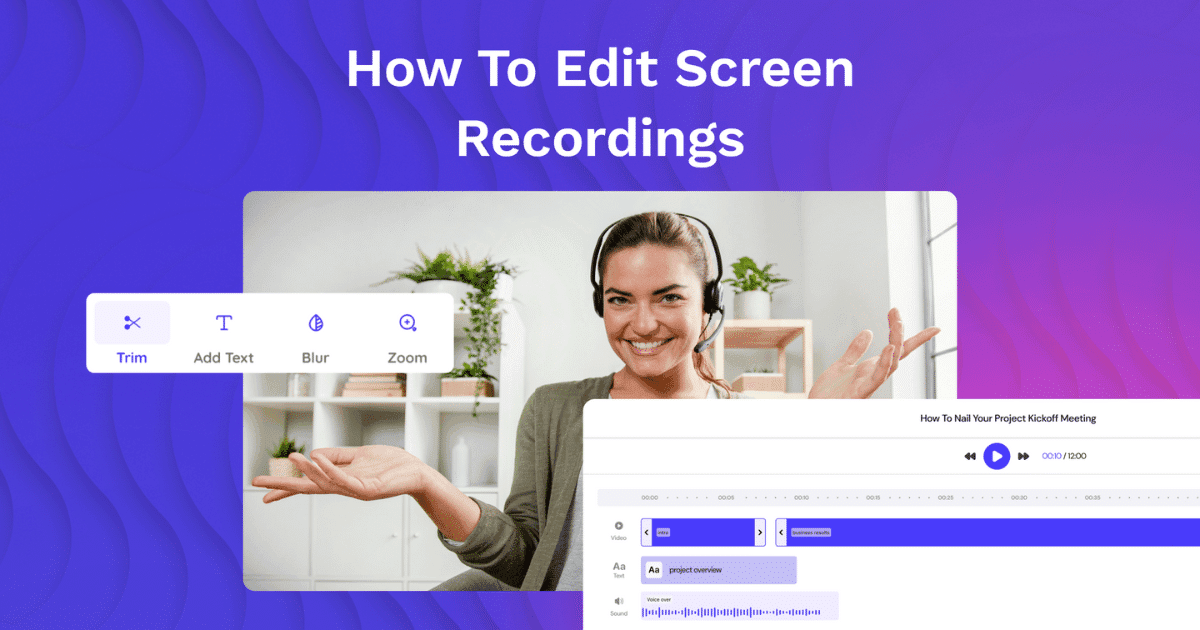
Step 2: Trim unnecessary sections

The video is now ready for you to remove any parts you don’t want in the final edit. Begin by playing your video from start to finish and identifying the parts you want to remove. These could be mistakes, irrelevant bits, or long pauses.
Look for the “trim” icon (scissors), and a new vertical line (playhead) will show over your video.
You can stretch the trim tool over the section of the video you wish to cut. You can add the trim tool multiple times you have more than one section you’d like to cut. This way you also keep your original recording.
Pro tip: At this stage, you can zoom in on a particular screen section. Look for the “crop” or “zoom” function, and drag it onto the section of your clip to focus on the exact area of the screen you want.
Step 3: Optimise your audio
Good audio can help make your recording sparkle. Whether you’ve already added your voiceover as you record or want to add it later, adding commentary is an excellent way of helping your audience engage with your content.
In Dadan you can currently tweak the volume of your video’s audio, but we’re currently cooking up lots more audio capabilities!
Pro tip: Follow these tips to record clean audio.
- Record in a quiet room with minimal echo and background noise
- Use a good-quality microphone. Don’t rely on your device’s built-in mic. Use a headset microphone or an external plug-in mic for the best quality voiceover.
- Speak slowly and at a level volume.
- Don’t panic if you make a mistake. Start your sentence again, and then go back to snip out the error later.
Step 4: Insert annotations and callouts

Adding annotations and callouts is a great way to add even more context to your recordings and visual aids to personalize your content. If you’re recording for work or educational purposes, you can inject your business or education provider’s logos. However, if you’re creating personal content, annotations, and callouts can help you build your content into an instantly recognizable personal brand that speaks to your audience.
Your editing tool should have a “Titles” or “Text” option. This allows you to add text overlays to your video. This is an excellent way of emphasizing essential sections of your content, drawing attention to snippets you want your audience to know.
Drag the text element onto your timeline, positioning it above the main video track. Double-click the text to edit it. Keep it short and precise. Change the font, color, and size of your text so that it contrasts with your recording, making it easy to read.
If you want to emphasize a particular area, look for the “Shape” or “Arrow” tools to draw the viewer’s attention to the screen section you want. Some tools also allow you to add callout animations, such as animated arrows, which are equally effective for highlighting important areas.
Remember not to overwhelm your audience with too many annotations. Keep things simple so they’re taking in the information they need. This will help keep your recordings clean and ensure your audience gets the information they need.
Step 5: Export and save

Run through your edited video to ensure you’re happy with the finished product. Then, it’s time to export and save.
In Dadan, just hit ‘Save Changes’. You can either save your original or duplicate so you can keep both versions.
Play back the your new video to ensure everything is as it should be, and you’ll be ready to share your freshly edited screen recording!
Advanced editing techniques for professional-looking videos
Now that you’ve learned the basics of screen editing, here are some methods to take your content to the next level. Try mastering these advanced editing techniques to create high-class, professional-looking videos.
Adding transitions and effects
Transitions help create a smooth, effortless flow between different scenes and sections of your video.
Choose transitions appropriate to the content and your audience. Flashy transitions can undermine the tone of more serious content but can enhance more creative, light-hearted videos. Once you’ve used a transition, stick to it for consistency across the video.
Use simple cross-dissolves or fades for a professional look, and keep your transitions short. Aim to keep them below 1 second to avoid disrupting the pace and flow of your video. In addition, apply transitions to indicate a change in topic, location, or time to help your audience understand the video structure.
Adding background music
Although your video may have a voiceover track, adding background music can make your content more engaging.
Think about your content and select music that matches the pace and tone of your video. Keep the music at a low volume, no more than 20% of your voiceover volume, and avoid using music where the lyrics might compete with your narration.
Most tools allow you to use audio ducking to lower the music volume when you’re speaking automatically. Meanwhile, audio fades at the beginning and end of your video to help introduce and conclude your content.
Finally, be aware of copyrights and use royalty-free music if you don’t have the proper licenses for using tracks under copyright.
Enhancing visuals
Taking time to refine the visual quality of your recordings can make it more appealing for your audience to engage with.
Adjust your brightness and contrast to ensure your screen is visible and text readable. Use color grading tools to ensure tones are consistent across different clips, particularly those from other sources. Finally, zoom and pan effects help you highlight important areas of your screen. For example, including subtle panning movements helps to guide viewer attention to a specific area of your screen.
Best practices to make your screen recordings stand out
These basic and advanced editing features will help you create professional, engaging, high-quality video content. However, here are some best practices to help your recordings stand out even more.
Keep it short and engaging
Keeping your viewer’s attention is essential. Plan your content and outline the key points you want to get across before you begin recording.
Use timestamps or chapters for longer videos to help your audience navigate to any specific information they want to find in your content. Don’t be afraid to switch between different types of visuals. For instance, switch between a written slide and talking head to maintain interest, or use overlays to include a webcam recording with the main screenshot.
Use high-quality audio
There’s no point in having excellent visuals if your audience can’t hear or understand what you’re saying. Invest in a good microphone, such as a quality USB mic to improve the quality of your audio.
Record your voiceover in a quiet environment free of echo and background noise. For the best quality, speak directly into the mic from about 6 inches away, and use audio editing tools to reduce background noise and equalize the voiceover quality.
Focus on the message
Focus on the core message of your content without overwhelming your viewers. Stick to a single idea in each video. If you want to cover multiple topics, create a series of videos rather than a single long-form piece of content.
Use visual aids to emphasize your core message in your content and communicate clearly. Speak slowly and use easy-to-understand language.
End your content by summarizing the key takeaways and reinforcing your message, helping your audience to keep it fresh in their minds.
Edit your videos with Dadan
Creating compelling and engaging video content is easier than you think when you use the right screen recorder with video editing tools. By mastering the basics and learning advanced editing techniques, you can create high-quality video content that concisely and effectively conveys your message to your audience.
There is no right way to edit your content. Don’t be afraid to experiment, explore, and try things out as you embark on your video content creation journey to find the style that works for you.
So, why not begin your video editing journey with Dadan’s easy-to-use and comprehensive screen recording editing package by signing up for a free trial today?
FAQs about editing screen recordings
What is the best software for editing screen recordings?
Dadan’s outstanding suite of editing tools is the best choice for anyone wanting to edit screen recordings to produce professional, engaging content.
Can I edit screen recordings on my phone?
Both iOS and Android devices have basic built-in screen recording editing tools.
How do I edit a screen recording for YouTube?
You can use any screen recording editing tool to create YouTube videos. For optimal quality, export them in MP4 format with a minimum resolution of 1080p.
What file formats can I export after editing?
MP4 files are the standard file types you can export after editing your content. However, some tools also allow you to export GIF files as well.


